Include your disclaimer, waiver, warranty, contract, and acknowledgment language in your bid document to automatically create customized Terms and Conditions for each job.
Table of Contents
- Add Terms & Conditions via Setup Wizard
- Add Terms & Conditions via the Company Profile
- Manage Terms & Conditions
Add Terms & Conditions via Setup Wizard
- Click the Setup button at the top left of the screen to open the Setup Wizard.
- Select the Terms & Conditions step.
- Start typing or copy and paste existing language into the open text box. Use the tools to add personalization or update formatting. This contract will be included in every bid sent to your customers via the software. Primary users can assign, edit, remove, and add customized, product-based and standard contracts, disclaimers, waivers, and warranties at any time in the Company Profile.
Add Terms & Conditions via Company Profile
- Primary Users can find the Company Profile by clicking on the user icon in the upper right corner of the screen and selecting Company Profile. (To find the user icon on a tablet or mobile device, select the 3-line hamburger menu on the top right of your screen.)
- Select the Terms & Conditions on the left side of the screen.
- Click the Add Terms & Conditions button.
- Give it a name and select the the type of Terms & Condition you are creating. This helps the software know ehere to place the contnet in the document for consistency and organization.
- Contract: The core agreement between you and the customer outlining the scope of work, payment terms, timelines, and responsibilities.
- Warranty: Explains what is covered after the work is completed, how long the coverage lasts, and any conditions or limitations.
- Waiver: States that the customer is giving up certain rights or claims—often used for unforeseen conditions or limitations of liability.
- Disclaimer: Clarifies what is not guaranteed or covered in the project, helping to protect your business from misunderstandings or unrealistic expectations.
- Acknowledgment: Used to confirm that the customer has read and understood a specific section—such as declining a service or agreeing to special terms—before signing.
- Add your content, update settings, and assign products.
- Complete the name and type of term you are adding. (The type determines where this language will go within the bid. By default, the sections are ordered with Disclaimers first, then Waivers, Warranties, and Contracts last.)
- Start typing or copy and paste existing language into the open text box. Use the tools to add personalization or update formatting.
- Adjust the Settings by flipping the toggle switch to turn the below settings on or off.
- Default- The content will be automatically added to every bid.
- Locked- Users cannot change the terms and conditions on the fly within the bid creator.
- Required- The content cannot be removed on the fly within the bid creator.
- Acknowledgment is required to sign- When enabled, the customer must check the acknowledgment box before they can sign and accept the bid.
- Link to Products allows a specific language to be added only when a certain product is selected. Assign content to your product(s) by selecting it/them from the drop-down list.
- Click Save.
Manage Terms & Conditions
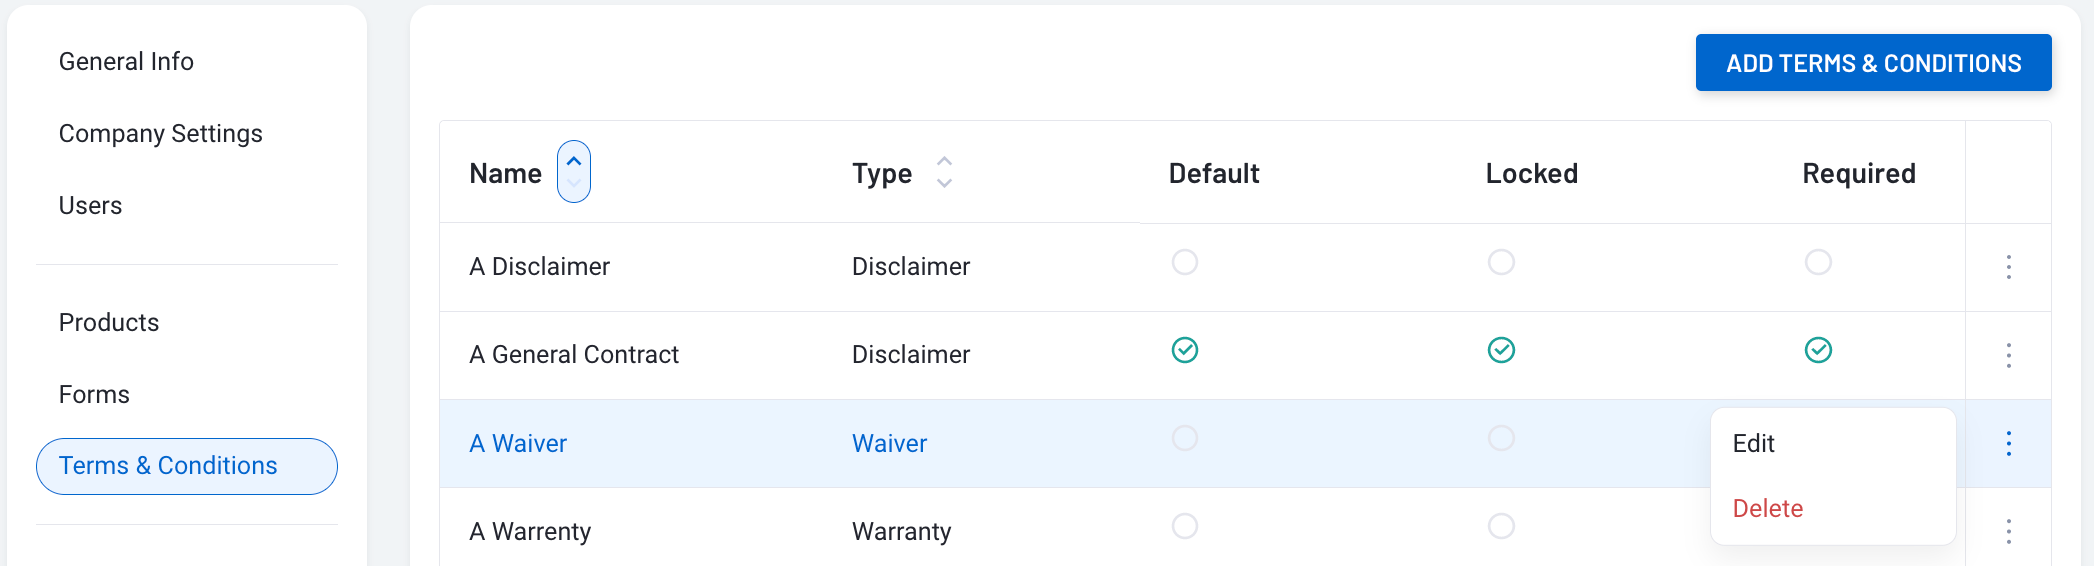 Edit
Edit
Adjust previously added Terms & Conditions.
- Find the Company Profile by clicking on the user icon in the upper right corner of the screen and selecting Company Profile. (To find the user icon on a tablet or mobile device, select the 3-line hamburger menu on the top right of your screen.)
- Select the Terms & Conditions on the left side of the screen.
- Click on the row or select the Action Menu button to the far right on the row and select edit.
- Complete any edits.
- Save.
Delete
Delete terms & conditions from the system.
- Select the Action Menu button for the terms & conditions item.
- Select Delete.
Comments
0 comments
Article is closed for comments.